UV Cured Pipe Relining
Clients are increasingly seeking sustainable, cost-effective, and efficient solutions for pipe rehabilitation that reduce the overall environmental impact and avoid destruction of property & extensive excavation, as well as a process that takes less time than traditional methods of pipe repair. This is where UV pipe relining comes in.
What does UV Pipe Relining mean?
UV cured pipe relining, also known as UV lined CIPP ( Cured in Place Pipe), is a modern no-dig alternative to traditional pipe relining methods. Unlike conventional techniques that rely on heat, water, and steam, UV cured pipe repair uses ultraviolet light to cure the resin within the liner.
The process is easier and quicker to implement, and it is also a cleaner, allows for minimal disruption and is more environmentally friendly method compared to traditional approaches.
Here are some reasons for that:
- The UV curing process does not use steam, which eliminates the need for heavy water equipment for pumping and heating. This contributes to lower emissions and lessens the impact on the client’s property and nearby areas.
- A UV-cured liner eliminates the need for digging. Digging can be expensive and destructive. With UV Cured Pipe Relining, there is no impact on important areas. This includes lawns, garden beds, driveways, and pools. The equipment used for UV pipe relining is lightweight. It is also easily portable, which is helpful for accessing difficult areas.
- UV pipe curing a stronger, thinner material has a minimal effect on the current sewer capacity. This innovative technology provides a strong shell inside the host pipe without compromising the flow capacity. It is essentially a brand new pipe within the existing pipe.
- UV-cured pipe lining takes less time to install, meaning the faster pipe repair procedures won’t result in your plumbing system being shut down for extended periods of time and much less time than traditional methods such as excavation. UV CIPP is also faster than traditional pipe relining services.
Understanding the UV Relining Process: Step-by-Step Guide
If you’re a property owner in Sydney facing drainage issues, you may have heard about the innovative UV relining technology. This method not only repairs your pipes efficiently but also minimises disruption to your property. We’ll walk you through the steps of the UV relining process, showcasing how it can restore your drainage system to optimal condition.
Step 1: Initial Inspection
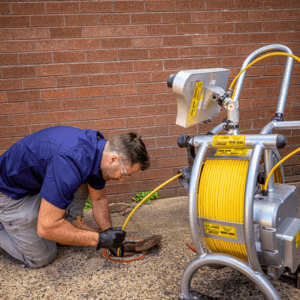
The first step in the UV relining process involves a comprehensive inspection of your drainage system. Using advanced CCTV cameras, professionals assess the condition of your pipes, identifying any blockages, cracks, or leaks. This detailed examination allows technicians to devise a tailored relining plan.
Step 2: Cleaning the Pipes
Once the inspection is complete, the next step is to clean the pipes thoroughly. High-pressure water jetting is commonly used to remove any debris, grease, or buildup that could hinder the relining process. This step ensures a smooth surface for the UV liner to adhere properly.
Step 3: Preparing the UV Liner
After the pipes are cleaned, the UV liner is prepared. This flexible tube is made from a durable material and is coated with a special resin that cures when exposed to ultraviolet light. The liner is measured and cut to the exact length needed for your pipes, ensuring a precise fit.
Step 4: Inserting the Liner
With the liner prepared, technicians then insert it into the damaged section of the pipe. This is typically done using a winch or air pressure, which pushes the liner into place. The flexibility of the liner allows it to conform to the shape of the existing pipe, covering any cracks or leaks.
Step 5: Curing with UV Light
Once the liner is in position, the next crucial step is curing. A UV light source is introduced into the liner, which activates the resin, causing it to harden and bond with the pipe walls. This process creates a robust, seamless barrier that effectively repairs the damage and extends the life of your drainage system. The curing process usually takes just a few minutes, making it an efficient solution.
Step 6: Final Inspection
After the curing is complete, a final inspection is conducted using CCTV cameras to ensure that the relining has been successful. Technicians check for any defects and confirm that the newly lined pipes are free of leaks and fully operational.
Step 7: Restoration and Maintenance
Once the inspection is done and everything is in order, the area is restored to its original condition. This may involve filling in any access points or cleaning up any debris from the job site. Additionally, technicians will provide recommendations for ongoing maintenance to help prevent future issues and keep your drainage system in top shape.
The UV relining process is a cutting-edge solution for repairing damaged drains in Sydney. With its efficient steps—from inspection to curing—it offers a minimally invasive way to restore your plumbing without the need for extensive excavation. If you’re facing drainage problems, consider UV relining as a long-lasting and effective solution. For expert service and consultation, don’t hesitate to reach out to our team today!


